h1

43.8 More Ruler Work Observations from Beginner – MAL 2019

March 9, 2019

I am staying as true as possible to the quilt for 15 minutes challenge for the month of March – aka March A Long. The only date that might have been missed was Friday. Even on Thursday when I was feeling a little under the weather, I looked through some designs in books that have been sitting on the shelf for years.

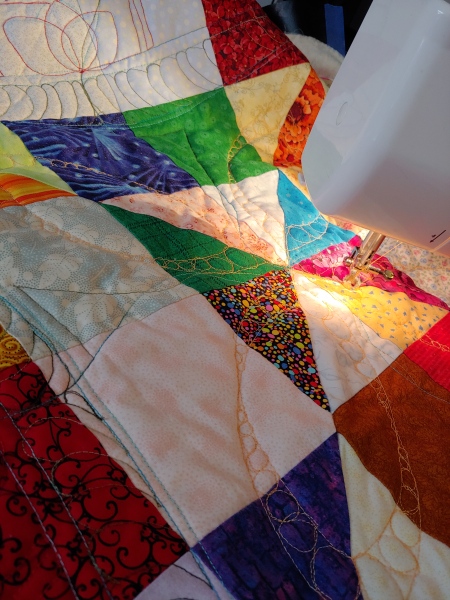
I have been staying on my free motion / ruler work for quilting working on my practice project.

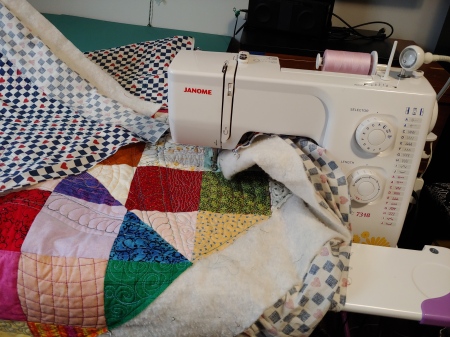
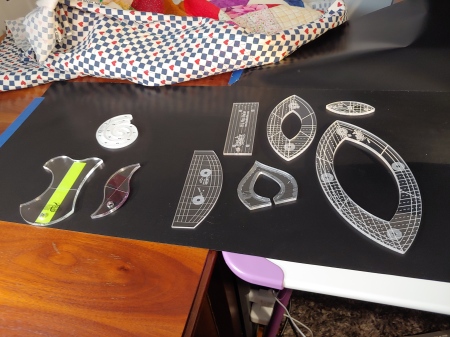
Last week I did some cross hatching, this week, I tried out the football curved ruler.

A little bit of practice every day. One day was the outline of two footballs offset on the same row, the next day was the pebbles.

I filled in the corners with this weird gap thing set aside for something and the swirls that I almost see as my default traveling pattern.

I have found that instead of a generic meander, I tend to go with swirls as a “I don’t know what filler to go next with” filler to get from place to place and to speed up.

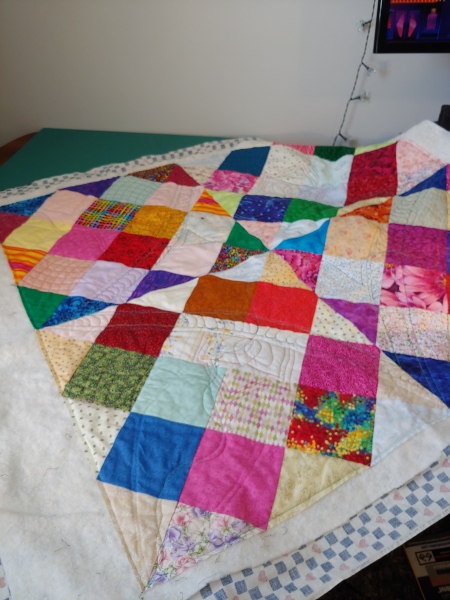
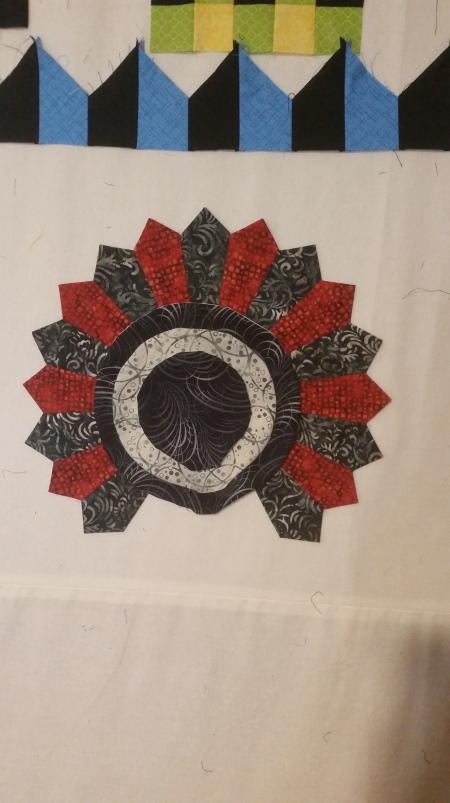
As you may notice I have a strange red thread design in the center of these white patches.

I did this with the marking pen around the ruler for the center of the design. This was to practice using my marking pen. I am not known to do a ton of marking or registration marks on my quilting. The pen took a while to get used to being used again, but seemed to do decent with the initial design.

This was before tackling any of the “rulers on the machine” work. Then I echoed it. Three times. Uhhh… two echoes, three lines.

Anyway, I am mostly happy with the work I did on the first pass, but my echoing skills leave a lot to be desired.

I am wondering what about this is hard for me to do correctly. Is it that I go too fast, or I can’t see well enough or I just “lose where I am” a little, or am a little careless, or I try to “make up for previous passes” by making a change the next echo and then actually make it worse.

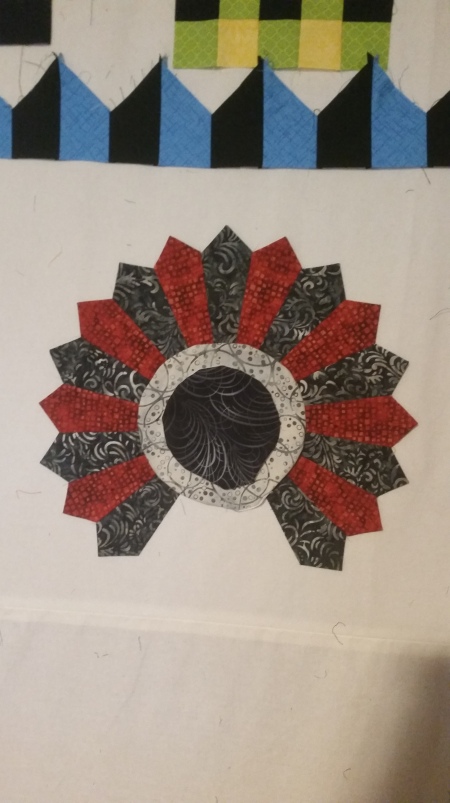
Granted, this would be better if the thread color actually matched the background.

This is a small issue I have to work out on my own. This quilt has both light and dark patches, and for some reason, I have decided to make it all symmetrical. Same shapes in each corner, same threads. Sometimes it means that the thread color contrasts, the other times it blends. More or less.

I am finding myself feeling moments of “rush” with this quilt. It is practice, I did not piece it. I do not see it hanging in my house, or given to someone else. I don’t know if it would be “good enough” to donate to the local hospital or not (for a lap quilt), I am mostly going through the motions on this quilt to really use as practice.

So I am periodically “speeding up” through some of the quilting.

When I first started, I was having lots of shredding thread issues. Because of that, I lowered the tension “way down”. So what did that cause? Eyelashes.

I went through the entire corner blue section with this rushed, low tension top which caused the back to eyelash incredibly badly throughout.

I am finding it hard to make myself stop and figure out what I am doing wrong, just getting through the section of practice without doing as much learning as I “could be.”

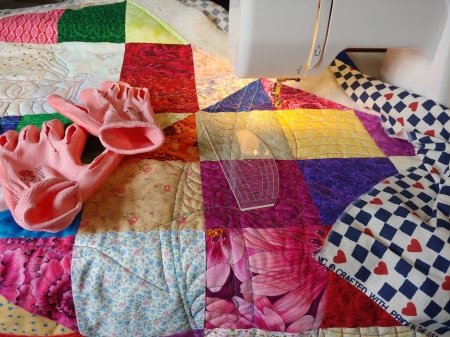
Since I was needing more practice echoing, I decided to use the curved rulers to help me out on echoing this.

And then finding a fill that works too. This worked well. I am amazed at how much I get confused or frustrated when turning the quilt around to the the other side of the design. Somehow now doing the same shape, in the same way, on the same kind of quilting background, I feel more frustrated on the 2nd half than the first half. Almost every time.

I am finding myself hitting the ruler on the machine, or getting it stuck behind where the foot gets in the way.

At least I figured out that the more I can do on the machine in one direction, the better off I seem to be. The first few circles/loops, I was turning all the way around instead of working “just the tops,” or “just the bottoms”.

I think if this machine was a higher shank machine with more throat space, this task would seem way easier at the moment.

Which I have to use what I have at the moment. I need to start a fund for getting either a Juki or something bigger like a sit down 16 HQ. But that, being down the road a bit, will have to wait. It’s hard to say, because I do really like piecing a LOT, and designing a LOT, and for those activities I only need the machine I have now.

I hate to come away from this post feeling negative about the whole experience. I am not feeling that way necessarily.

This is fun, I might need to figure out how to move on to my real projects pretty soon though. Keep my tension in check. Watch for my foot slipping off the screw and falling down – something that happened this morning and caused issues trying to get through some of the tough seams on the underside in particular.

This is really nice, and I am glad I am working on this, and I know in a few short weeks I will be piecing again.

This is my stopping point at the moment. I need to get on and do a few other things this weekend. I have a plan for the other four corners in this section, and I have three of them to do still. I really hope this practice quilt doesn’t take the entire month of March to quilt, but as long as I March-A-Long and keep at it, I will eventually be done! And I will have a nice reference too!

h1

43.7 First Weekend of MAL 2019 Free Motion Ruler Work – Beginner’s Perspective and Setup

March 3, 2019

I love March for many reasons, none of which is the snow that fell last night. March provides a good jump to get me in the blogging mood, in addition to the quilting mood.

For the uninitiated or new who lost/missed my last two posts, today, March 3rd, is the third day of March-A-Long. A monthly sewing celebration of working on quilting for 15 minutes a day during the month of March to see how much we can get done with a tiny bit of discipline.

Some years, I focus on a specific project, some years I just work to further along all my projects.

This year, I have decided to focus on Free Motion Quilting, and finally learn some quilting ruler work.

To start, last week was basting a bunch of small quilts with the goal of getting the stained glass quilt quilted by the end of the month.

Then I purchased from Amazon a roll of Oven Liner.

Wait?! What? What does that have to do with quilting or ruler work?

A comment from a FB group by someone I don’t know said the word Oven Liner, and since I didn’t already own a supreme slier, seemed to be a cheap way to experiment to see if I would like to try smoothing down my surface for free motion quilting. I could cut it to length I needed, I could make cutouts on it.

So the roll of oven liner is now on top of my sew-ezi table and “heirloom (aka inherited)” table next to it.

I cut a 2nd piece of the oven liner to serve as a “bridge piece” behind my sew ezi table. Behind, I have a machine in a cabinet (Aquata) that hasn’t seen the light of day since I got my magnolia machine. MMMMMM

I set my tv on top of the aquata cabinet, and it sits (higher, sadly) behind my table. And then proceed to watch Craftsy/Bluprint videos from the tv while quilting.

The oven liner is really helping to bridge my quilts up to the higher level without fuss or problem. I do think I am putting a tiny kink in the oven liner. Oh well.

I cut a small hole for the needle and used the oven liner all day. Used blue painter’s tape to keep it secured to each surface needed.

This DOES HELP the quilt slide fairly well! I was impressed with how well it worked! Cost me half as much as a supreme slider, was versatile and helpful.

What I did not realize that to change the bobbin, I was making things worse.

No one has ever accidentally sewed up their supreme slider to the back of their quilt and then ripped out the stitches, have they?

I would lift up the right side of my tape to get all up underneath to change the bobbin.

I started having bobbin tension issues. First, I had different thread in top and bottom. Then I kept having the issue where the bobbin thread wraps around the wrong way (though I thought I did it the right way every time). Lots of different times. Changed tensions, tension on the top seemed super tight even just threading and re-threading the machine.

Tension on the top is now down super low, which seems to be “on par” for this machine specifically.

Cleaned up inside the machine as much as I was able to dare without hurting the machine or doing anything too rash like taking it apart.

I realized I really need to get this professionally cleaned. Ugg. Not this month.

The cleaning and tension and changing the bobbin threads seemed to help.

I have been watching Free Motion quilting videos (already said that). By virtue of the idea that I could lower my feed dogs, which I only discovered in January of this year because I was supposed to have a workshop that got cancelled due to weather, I was able to get the ruler foot on the machine – correctly and without hassle – and place the ruler in front, or to the side of my foot.

My ruler foot is one of those aftermarket ones instead of one of the Janome ones. Some time ago, I bought a ruler foot, had problems with the ruler hitting the back when trying to use the ruler, had a poor ruler with very low markings on it, and frustrated with the entire idea of ruler work and put the whole thing away for a year or so.

I am realizing now that this low shank machine is why I was frustrated. And my aftermarket foot is why. And my feed dogs.

I had always gone by Leah Day’s idea that “it’s ok to keep your feed dogs up” and just worked around that idea in the past. I couldn’t predict the height of the feed dogs with the non-hopping ruler foot, I was used to my hopping free motion foot.

In the past, I really didn’t spend a ton of time working on this problem.

Watching the videos now, I realize that a common problem of these aftermarket feet is the space between the foot and the “foot holder post thing”.

Angela Walters said that you try to use rulers on the front or left for some machines, and Amy Johnson said some rulers have different thicknesses and that the low shanks like what I have is just going to give problems getting the ruler to go around back.

Here are my (now growing) list of rulers for quilting.

The ruler on the farthest left is probably an ok ruler, but it has only one marking vertically, and one marking horizontally. I do believe this ruler, I was trying to use in a way that wasn’t going to be successful (in the past), and even after I had done some practice, at the end of the day yesterday, I was still trying to use the ruler just to see, and getting frustrated. So I think this ruler is not for me.

Next to it, is an “s curve” ruler, also with minimal markings.

And the spiral, which is either going to be really long from now when I figure out how to use, or just going to be available as a “marking-type” ruler instead of a “quilting-up-next-to-the-foot” ruler

I also put onto the backs of these rulers just this morning were these dots.

You might be able to see on the s type ruler two purple blotches. This is a cheap version of “invisigrip” in the form of purple colored Hugo’s Amazing Tape, which I got for board games and use to keep my board game cards together in a group. Not really feeling the groove of this ruler either, maybe it is the gripping, maybe the size, maybe the lack of markings, maybe it is something else.

When I did put the Tight Grips product onto the backs of my other rulers, I could tell a distinct difference, these rulers stay put. Or seem to.

Anyway, the other thing I worked on this morning was fixing the main problem of loading my bobbin from the top underneath the oven liner. I cut out, again with exacto-knife, the area around the bobbin area. Because I happened to look up when Amy was showing off her supreme slider and by golly there was a hole in hers around the bobbin area.

I hit my head with a “do-ooohhh-innng” kind of realization that I could do that too.

Only took an entire day of stitching and messing with and being slightly upset about having to change the bobbin.

I keep thinking I am going to actually stitch this morning/afternoon, but I might not. I have been working on this blog post, fixing my area around my machine, fixing my oven liner solution, moving some of the furniture in the back around slightly differently, going out to scoop the snow for tomorrow.

I have found it easier to get started quilting when I have a plan, and right now the parts I have on this practice quilt, I don’t have a plan for. Yet.

Anyway, that was the very tinsey itsy bit of my March-A-Long. Join in, tag #marchalong or #sqmarchalong or something similar, reply here or FB. Let me know you’re up and doing this! We can all get more quilting done together if we work at it, little by little.

I didn’t get to show off my crosshatching, which was done with the curved westalee ruler I got with my foot. The half feathers at the top of this picture was done some time ago.

h1

43.6 Let’s Get Ready for March A Long 2019

February 26, 2019

Hey! End of the week this week leads us smack dab into March!

I decided to make a video to commemorate the beginning of March, because that is the month I try to “rally the troops” (ants) into sewing every day for 15 minutes a day!

So, we try to encourage each other to do a very mild discipline in our quilting! Just 15 minutes a day! It is usually one of the more productive or creative times of the year for me, it can, at times be hard to get me out of the sewing room in March!

Anyway, whatever it means to you to work on quilting, be it planning, cleaning, organizing, cutting, pinning, quilting, stitching, ripping, applique, embroidery, binding, retreating, blog-hopping, buying, auditioning, dreaming, designing, writing quilt patterns, doodling quilting designs, playing with color combos, swapping, meeting other quilters, quilt meetings, round-robbining, rug-mugging, bag making, DVD watching, craftsy watching, ….

You get the idea.

Here are my inspiration to start on March A Long for free motion quilting.

This top and backing need basted, marked and quilted

In searching for batting, I found two black batting pieces I could make into a larger batting piece to get this quilt free motioned, and so I made an appropriate back for it (on top).

And I watched classes on Ruler quilting and free motion quilting to get me ready with this stack of mostly practice sandwiches first. My free motion quilting ruler collection is small, and several are not quite as recommended because the lack of lines and markings.

Currently I might try the applique sheet on the gap between my sew ezi table and my grandma’s old living room table. I have yet to buy a supreme slider.  But I read online that you could use an oven liner too instead, and am considering that.

Just by stitching down the stained glass bias tape on this quilt was enough to remind me that the corner I have behind my sew ezi table is a little wonky. But it got me into the free motion mood.

I did also buy a dog grooming station, to hold all the bulk but I haven’t set it up yet. I want to see how easy it is to quilt the black Star Struck quilt first. And possibly move around furniture behind the sewing machine to run it into the wall?

These are currently my goals and plans for sewing this coming month. What are yours? Going to want to play along with us?

h1

43.5 Ten Year Quilt-a-versary – First Quilting Moments Revisited

February 24, 2019

In 2008, I drove around with a second hand book in the back of my car that said “Your First Quilt Book”. The book sat in my car for the majority of that year. Finally in February of 2009 I used enough “good work credits” (sorta) at work to decide to afford to get my very first sewing machine. I had never used one outside of school, but had fond middle school memories of sewing activities.

I called my first machine Molly.

I picked a design out of the book to work on, went to Walmart, bought fabric and started to get some other supplies for this project, and in a short month stitched up the center of the top.

Here I was laying out the fabric for my first quilt block before sewing. (taken Feb 22, 2009)

These are the blocks laying side by side. March 4, 2009.

Here it is with simple borders (taken March 8, 2009).

At the time I was really focused on getting the top done, but this was spurring me on to more and more down the quilt rabbit hole. Seeing so many pictures of other people’s quilts online, starting to listen to quilting podcasts, hearing people talk about quilts and techniques.

So I attempted to quilt this cute little top in the summer of 2009 (July 2009) to be able to work on the projects I had already started.

Learning about binding from a small group I started to sew with (that doesn’t exactly meet anymore in the way it used to, but am still friends with several online) caused me the courage to actually do the binding on this quilt for the first time.

And then I got to hang it in my tiny living room for quite a while.

During this time about 10 years ago, I was trying to get myself out of a funk, learn something new and exciting and beautiful. Starting to look at patterns, get a hold of a sewing machine and supplies, get stuff in order to decide to actually take the quilting plunge.

At that time, I had no actual knowledge of people in my family being “avid quilters”. Yes, my aunt was crafty, but crafty in lots of ways that also included sewing. Yes, I have fuzzy memories of my other grandma owning mysterious “sewing machine” in her bedroom.

I do remember as a child checking out a crafting book, learning how to sew, and then doing some running stitch hand-sewn pillows. My sister got a sparkly pillow with the “best looking fabric” that left glitter on her face, which was a childhood mystery until we figured out that sparkly fabric wasn’t best suited for sleeping and pillows. Then the middle school class which we sewed things, and even an activity of machine quilting (we did a log cabin block in pinks and blues).

So much over the years though.

Convincing people to come to our regional show from out of town / state.

I did, in the last several years start to spur my one aunt into quilting more, with my enthusiasm for it, and it has been nice to be able to share some of the hobby with someone I knew before. We joked about Cow Quilts, drove all the way to Michigan from Kansas / Iowa just to see some quilts and some internet friends.

Countless jokes about “Is she done yet?” or “Quilts don’t go on beds, they go on walls.” or “If you just made a little larger, it would be a nice blanket.” have been staples of my quilting journey over the last 10 years.

But also affirmations about being creative, having good color sense, designing by book and by program. Creating my own podcast for a few years, this blog, various online social media accounts, various retreats, a few in other states, renting a long arm, getting better at free motion quilting myself, design, quilt, create, write pattern for my guild opportunity quilt, and the upcoming and annual, continuing March A Long month- long-every-day-sewing inspiration.

So much in only 10 years! Was not sure where I was going to be 10 years ago, but because of you, I have enriched my life, my creativity, my art, and found such satisfaction and sometimes peace.

Upcoming posts about March A long will hopefully catch you all up to the last few months of quilting progress and quilting! This blog has become less about you, and more about me, and that’s not really ideal, but it is what has happened. I am still grateful for 10 years of quilting journeys!


h1

43.4 Sukey’s Reverse Quilt Top Completed!

November 9, 2018

After coming back from a much needed vacation, I set up to finish the quilt top for the Sukey’s Reverse quilt for the guild. Last post, I was waiting for some blocks, and with special guidance, was able to ask for last minute help getting the blocks done and to me in the deadline I set for myself.

So, just before leaving on vacation, I was secure in knowing I had the blocks in my possession, and the weekend I got back, was able to “vacation de-stress” and make my “at home” quilting retreat to work on the final borders and layout and quilt top for the Sukey’s Reverse quilt.

First, I made some of what I called, “magic sashing”. 

The very edges of the quilt, I made a 1.5″ strip with mostly white, but with “cornerstones” on each side of 1.5 by 1.5 so that the sashing is the same size as the final unfinished quilt block: 12.5″ Pieces added were 10.5 X 1.5

This finished out the larger block design on the outside edge.

Another guild member made several of these “inset border” blocks, just the same small block pieces that were in the rest of the quilt. I tested out the “seminole piecing” technique of surrounding these blocks by triangles cut by a quarter square triangle method.

These borders were fun and it’s always fun to “fudge” the numbers of each color needed for the side of the quilt. The quilt is based in blues, so the swirly blue is the main color in the border. But the quilt is also based in some other cool colors, and it was fun to put them into the quilt in addition.

By surrounding the block by the same color as the white (one of the colors of the four patch) the two colored pieces appear to “float” in the quilt. Since I was doing the seminole piecing, I decided one side of the triangles would be the same background, and the other side would be colored. This also makes the pieces appear to float in the middle of the border without being too wild or hard to do.

By the end of the weekend I came back, I had the whole top together and pinned to my design wall, and all the pieced borders of the quilt done. Notice how the center fabric was one fabric I had in my stash that leans purple, and somewhere in the middle on each side, is one or two fabrics that lean blue green, but the rest are blue.

The following weekend, or maybe it was the one after, I was able to attend a sewing day and get a “stay solid border” in between on the edge of the quilt.

I had electric quilt calculated the number of blocks needed for the quilt as I had made, and then got a rough idea of the full size of the inner border of the quilt.

I was originally going to make the dark border a little narrower, but tried to “size up” a little bit to try to match the pieces on the outside.

I was close. So very close. Different adjustments might have had to be made as necessary.

Turns out each pieced border was 0.25″ too long. Trimming it up, I now have added my quilt borders shown above to the edge of the quilt.

The edge of each of the side borders is also the same background color as the rest of the background. This made it really easy to be able to trim up my slightly too long pieced borders without sacrificing the design. Also lucky me that after sewing was only 0.25″ off!

I was going to add one more dark border (hard to see in the picture above, but dark blue/blue-purple is the inside border).

This quilt is measuring 103.25 by 90.25. and this part is done up to here. I am hoping to turn it over to the quilter to have it done in the late winter/early spring for the 2019 fundraising.

Lots of work, a few “rouge blocks”, lots of cajoling or reminders of getting the blocks back, and lots more organization than I really wanted to do.

At the end, I did push my guild members to get the blocks done. But contrastingly, I did push myself to get the rest of the quilt done also. Most large chunks of spare time on the weekends so far in the last month and a half have been doing something more on my part of this quilt.

I was pretty exhausted this year doing all this guild work for 2018. Doing a large part of putting together the guild show and putting this together also, not a great idea to do both around the same time frame. Maybe if there was only one or the other, it would have been a little more manageable.

A few personal items in my life early in the year, and extra hobbies this year have pushed everything so squished for 2018.

But even with all the issues, prodding, pattern writing stress, I am happy with the quilt as it is. I find it funny that my extremely scrappy blocks made first almost look out of place. But not. Not really. So many “quilt philosophies” here. I love group quilts and seeing everyone’s creativity!!!!

I haven’t quite finished the updated instructions on the borders. It’s been a mish-mash of pictures and ideas so far which I haven’t edited down to a complete item. And it turns out that the borders fit better than I originally planned as they were actually cut.

I am going to miss having Sukey’s Reverse quilt in the house! I will need to do a major amount of donations to be able to get the quilt back! Or I could make a second one. A year from now the quilt will be drawn for. A large year and fun year of this quilt in the making.

I am also going to be happy moving on to something else for a while!!!

h1

43.2 Waiting game for last of the opportunity quilt blocks

October 12, 2018

Racing back to the opportunity quilt my guild is putting on, I put down in a post a lot of feelings I have had about working on the quilt. Currently (at the moment of writing, not the moment of posting) waiting on 7 blocks to show up in my hands to finish the center of the quilt top we are working on. I have decided (at the moment of writing) to have faith that the blocks others have signed up to do are done. I designed the quilt, ended up making the deadline for the blocks middle of September, and now am in a waiting game for the last blocks to show up in my hands to be able to put the top together with the extended deadline of next weekend.

I am re-releasing my thoughts here about working on the quilt top. A lot of it I feel are current blocks I am trying to work through on my own about my own failings, and what types of things I am personally working through that have come up with the working on this quilt. Most are how I feel about myself. Of note: I got into a huge fight with one of my friends while working on this quilt and with the guild this year. Because of my feelings towards myself, and my attitudes and my expectations. I know I do show some judgement of others below. Hopefully it doesn’t come off as too strong to anyone but myself. Comments shared word for word elsewhere are in italics.

Feel free to skip this post if you aren’t interested in quilting with self reflection.

The quilt is called Sukey’s Reverse, and it is re-designed from a generic block called Sukey’s choice from a block I got somewhere in some calendar or post. To my knowledge, this block doesn’t exist out there yet to any kind of popularity.

Thoughts on my adventures of “ being in charge of the group opportunity quilt”. Have been spending the extra time this weekend on getting parts made for the borders of the group quilt to be ready for when all the blocks magically show up in the next week. Also prepared to angel yet another two blocks in case I don’t get them by Friday. As in, one extra block is done and will go in my own quilt if they all come back, completed as promised, and the other block all the dark rectangular and square pieces are together. I have already signed up and made 4 blocks for this quilt already, and started looking at options for the “too small” blocks, of which I think I have found 2. No one seemed interested in helping with the pieced borders, which is fine, not everyone’s taste, but it is good to get started on some of the pieces already. I also have some “magic sashing” and cornerstones to do to finish out the design just before the rest of the pieced borders. I have yet to sit down and actually measure any one of these blocks to the “correct size”, but along the wall the other day, no one block stood out as being extra big either.

I think some of my stress is not physically being able to be present at the October meeting, and wanting the top done by the last meeting of this year. (In November) I have had fun with it, in the design, but not necessarily in the constant going back and picking up blocks part of this quilt. I think a lot of it is because if I don’t work “really hard” at being organized, I am forgetful enough that I do get off track more than I should. It has been a testament of faith trying to wait for people to make them. Here is hoping that the faith is not misplaced. I am happy enough with the blocks I have that I can shorten up the quilt now if I would absolutely need to in a pinch. Nonetheless, I still have angel blocks in the wings. I am extremely grateful for the ladies who not only promised to fill the last remaining spots that no one else seemed anxious to fill, but for getting them done and to me as well already. Now is a sitting and waiting game for the rest of the blocks by the deadline of next Friday.

This year, I have completely overextended myself with my activities with the guild, taking on this, taking on the organization and entry of the quilts for the local show. It has felt like this year, my extra time has not been mine. With a very small exception of a month or two at most. I realize a lot of this is my own fault, my own complications, my own overexplanations that no one will listen to, my own constant need to ‘oversacrifice’ to prove to others that I am worthy or worth any attention. I have been known for getting attention for my quilts and my quilting, and my designs, and so I have leaned on that hard to “validate my self worth”.

(Some of this over-sacrifice has even lead to my insistence that I was eventually going to “figure out the borders” later. Even though I had a design that had good borders that I liked. But no time did I really ever give everyone the “here’s how to make the borders” part of the quilt, and no time except for the first pass around of the sign up list in March did I ever again ask for people’s help doing the borders) Which means I do have another thing to do now. I am currently ‘reworking’ part of the  borders of this quilt.

I know that I don’t do a lot of things for other people, and see these acts of service as “helping the greater good”. A lot of quilters that I know make quilts for others as a regular part of their quilting lives, and I can’t get a chance to finish anything I have started. But some of that is because of this. I do tend to keep the smaller quilts I make. There is also lingering guilt that I never got a quilt made for her before she passed on, and that my indecision in things never gets anything completely made unless I have a deadline, or unless other people are counting on me.

(I wrote once fully, and then rewrote smaller two separate versions of the pattern for this quilt).

(I was very excited to get the instructions down to one page, but yes, I did just say we’re going to do the borders later in the instructions, and then put a picture of the original block there). Being asked now by one of the people who have been done and wanting to help as of now).

Then I start thinking about how the whole opportunity quilt thing works.

I wonder how easy it will be to be sitting selling tickets for this quilt next year at the large quilt show, and how I will handle any off-hand remark from others about not liking the quilt after putting this much work and effort towards it. And I wonder how I will feel when it leaves the guild’s hands completely at the end of the year next November. Oh, am I supposed to be the one who organizes people to sit with this at other guild’s shows to show it off to sell tickets to it? I hardly want to think about adding that type of task to my list as well next year. I hate that type of task, and am slightly hoping that once this quilt top is made and at the quilter’s it becomes someone else’s issue to deal with. I suppose I can ask, but there is a nagging feeling that no one else will want to do that part either, and it will also fall to me, but we will see.

(picture below me sitting at the last opportunity quilt at the event described above)

Something about quilting that is somewhat unique is the sheer amount of planning, preparation, doing of tasks to get a piece like this done. As with any art, it has gone through many hopes and dreams, many aspirations, many variations and explanations. A lot of thought goes into this. Including the “oh, I haven’t finished my part in this”, and the “why hasn’t everyone even signed up to do this” and now the ecstatic joy to see the matching fabrics contrasting the ‘very, very scrappy’ fabrics, the possibilities, and even the condescending comments about how I am over explaining too much again in effort to be helpful, but also sting slightly. Which is nothing new to hear, but still hard to hear as well. In addition to the blow up over a promise that didn’t get fulfilled in the time frame as well. In these hopes and dreams and feelings, are each stitch, all these promises of getting things done, of helping others, of the greater good, and of “getting this thing off my plate already so I can get going working on something else for once” too.

Just a quilt, huh? Just a blanket? Something pretty on the wall. Or on the bed, or on the couch, or hopefully not, in the dog bed. I just hope the person who draws the # for it has an appreciation of it. I was glad to be a part of this quilt, and hope someone else can carry the “weight” of it next year!

(Not so sure I will abstain from doing designing and collecting of blocks the following year. I have been overwhelmed for the timing of both the quilt show and the opportunity quilt being the same, similar time frame, in 2018. I am sincere in hoping others will be able to manage the distribution and sale of this quilt I am working on now for the time of 2019. Timing of the next opportunity quilt will also fall on the same year as the local show, 2020, of which, I still hope to be a major part of that project.) Not sure now how I feel about that right now.

As someone said, I shouldn’t have to do it alone. I don’t know why I always struggle to ask for specific help. Somehow, it’s a part of who I am – or so I think. If I work on the skill of figuring out what specific help to ask for, and being specific on what is needed, then maybe I will be able to ask and receive the help. But, sometimes, the anxious part of my brain is worried that things will fall through and will be on my shoulders again at the end anyway. In all honesty. If I can figure out how to quiet that part, or work with it, instead of against it, things might feel more peaceful.

I have been surprised at my feelings of waiting for blocks the last week and a half. I have said to myself and at least one other, “I have to have faith they will arrive.”

h1

43.1 “Handwork” to avoid carrying around my machine

October 5, 2018

A small sewing group meets about once a month and I have been able to be a part of it. I took my pinwheel blocks, which are leftover from as swap from 2010 or 2011 and decided to ask if I could learn how to “spin the centers” of the back of the pinwheels

Somehow I had a little bit of a struggle. One, I misheard and started pulling apart the backs of the last seam instead of the next to last seam. Things went crazy. The block was re-sewn.

Eventually I did get it figured out, with the help of my friends. I didn’t cut off my dog ears before sewing these down, which actually made it decently easy to pop the opposite seam (both sides) and flatten it out. I sat the afternoon and got most, if not all, the pinwheels popped. I had 88 pinwheels to do.

Then, sometime the last few months in between projects, I got some sashing, cornerstones figured out and cut to size.

Which meant I had to trim up my pinwheels to the same size.

I was able to use some offline time away from my machine, away from internet to work on these. It was sorta tiresome, but the perfect opportunity to do a little bit of offline sewing.

h1

43.0 Dressing up the stained glass quilt

September 28, 2018

In contrast of the red and grey Dresden flower quilt, I was cleaning up the parts of the Forget Me Not stained glass quilt pattern, and I had a few ideas on how to do my borders on this quilt.

It was a nice change and I noticed the shift of tone, both literal and figurative, of working on such bright colors.

A few years ago I got a few green-blue-green fabrics that worked well with each other. I had done my “twisty quilt” from the challenge from my guild from 2 years prior, and these leftover solids were hanging out in my stash, but seemed to play nice with all the pretty fabrics of the forget me nots.

I started hijacking the initial fabrics provided by the quilt kit pattern that I bought initially, but still had a desire to use the fabrics somewhere in the border.

I also imagine the borders of stained glass windows to be made in smaller, manageable pieces like bricks.

And I have a very wild, colorful fabric that many people would automatically decide was perfect for a border fabric, but is usually not my preference. But I auditioned it next to the forget me not fabrics and was reasonably happy. As long as I continue on with the stained glass part of the quilt, which will frame the wild fabric well next to the prettiness of the applique of the forget me nots.

I didn’t take pictures of the quilt as I was designing it in stages, only at the end.

Actually these pieces are still all in the auditioning phase. None are cut out to the correct brick length or figured into the design of the end of the borders of the quilt completely. I do know my limited amounts of fabrics have kept the widths of each blue border bricks to these absolute widths.

Also I had some leftover bright solid yellow left from the same challenge quilt. Since yellow is such as strong color, I plan to use “mini bricks” in the rows of the borders to bring the yellow color outward from the middle of the quilt.

And then the large patterned obnoxious fabric I think will rest widely on the outside of the entire thing without doing any bricks on it.

But before it gets completed, I have the frontward-facing flower shrank down and copied, ready to add to the outside borders on top of all the bricks in at least 2 different colors.

And as of a couple of weekends ago, this was stitched down to the back.

I used the F stitch on my machine, a blind hem stitch, which meant I had to keep on the right side when sewing it down. I used Aurifil smoke colored monofilament on the front, and as you might be able to see, grey thread on the back.

Try as I might, it’s going to be near impossible for you to see the monofilament on the front.

But this project, even though the color, the brightness, the hope did it’s job to pull me from an area of darkness, my focus had to switch back to other things, and put this one aside for the end of the year this year or beginning of next year.

First to do some handwork type projects to not bring my sewing machine to a small sewing day, and then to have something to do offline when out of town, and then onto the guild quilt that I am in charge of making, as it is the one with deadlines and other people involved.

I do have to say, that it was really striking to have both this quilt displayed right next to the grey Dresden quilt on my design wall. It really showed the “tale of two cities (quilts)” vibe here of best of times, worst of times. It was kinda nice to see the interplay of both those types of feelings together. The spring, the color, the designing, the bright yellow pops, the curves, the possibilities!

h1

42.9 Grey Dresden quilt to help work through sad feelings

September 12, 2018

In the brief couple of weeks at the end of one project (guild show) before ramping back up with the opportunity quilt project, I have been working out my feelings between two different “art quilts”.

The last quilt I posted about the Dresden petals offset ended up being the “sad color quilt”.

It seems strange to be working in color pallets leaning towards grey and neutral, but also cathartic.

Last I posted was an offset Dresden petal with strange circles. I actually took the design a little bit farther before I got stuck.


I started making the grey petals to complete the design and settled into the light grey petals for the bottom of the flower. Then, since my other project I was working on just beforehand was a stained glass quilt, I thought about making a “stem” out of the premade bias tape I was using for that.

And can’t some other petals pretend to be leaves since they were pretending to be flower petals,

And then, can’t some other petals pretend to be grass, and be present at the bottom of the quilt. The flower has to have something to sprout from, doesn’t it?

I have glued down the stem as it is, I am not 100% certain I like how thin it is. But perhaps it could represent the thin feelings of the weight of the heavy flower being held up by a thin feeling of support, ready to crumble at any moment, but still holding strong anyway.

During the making of this quilt, I have been spending a lot of time working through some thoughts about how I am as a friend, about how much work I am spending towards others, how much I have been putting off grieving a loss of mine from earlier in the year.

How I have thrown myself into my responsibilities, even when that doesn’t mean “work” for me this year, well this is all in addition to working and driving, and having my normal crazy hours. How much I have done for the quilt guild I am part of, and how much I feel others might be smothered by what I am doing & overdoing, and how much it feels like I have been wanting to take a step or two back, but not being able to, and how lonely it feels to see others not feel so trapped in the feelings of getting too much done.

How I have been selfish, and selfless, how I have used other people, how I have helped other people, how I have sacrificed, how I don’t have a good support if something would go wrong. How unreasonable my expectations are of myself and of others. How much can I be expecting from others if needed. How to ask for help when things are going too awry. How I don’t feel deserving of help even if I do ask. How I haven’t been “really listening” to others.

How disappointed I was in a lot of areas, even thinking back to last year when we missed seeing the “great American eclipse” due to poor weather in our area, despite being directly in the center of the path of totality.

Anyway, in the background, I was working on this quilt, giving it “life” trying to create a pleasing design even when the thoughts I was having wasn’t exactly pleasing. I was listening to someone talk about working though issues at the same time.

Something about that was comforting. I obviously still hold some of the negative feelings I thought while making the quilt, but the act of putting the negative thoughts into the quilt as dark lines, dark themes, grey themes was nice. And then the idea of making a picture of my negative thoughts and putting them behind me, shrinking them down, and giving myself a safe space. It was nice. Pleasing. Kinda “whoo-whoo” but also needed, and reminding me how things were when I was a little kid.

I have sorta stopped working on the quilt now. I made a yellow sunshine that both compliments and contradicts the dark and the grey, and I keep trying to figure out what to do wit it. I have covered it up some with a grey piece, maybe to try to put out my grief from not seeing the eclipse last year (anniversary of it was during the time I was working on this quilt).

I was thinking about “sunflowers” as this is the Sunflower State that I live in now. Maybe I could make the yellow to either represent the sun and the eclipse or the sunflowers.

But not quite sure how to do it.

Someone in a comment accidentally through autocorrect called this the Offender Eye without seeing the yellow piece. Which might be an apt name for this quilt when it is done instead of grey Dresden quilt.


I have ideas of a darker pieced border with light grey diamonds around the center of this quilt.

Currently the thing is glued down with washable glue only. I would like to get some of this stitched down. Probably not the droopy yellow sunflower part.

I did glue down the borders on each of my circles with the bias tape and boy, does it make my “circles” look much more smooth.

All the feelings for the last few months have been feeling very BIG, very overwhelming. I know my natural “anxiety state” helps drives some of these big feelings, and anticipation and grief, and a ball of cuddly old feelings. Suddenly felt like the feelings were also overwhelming. And how it would be easier to shut some of this down for the time being, with intent to explore further in the future.

But, suddenly, with the wisdom of the guy I was listening to, the shift focused onto a much brighter quilt suddenly. And then, working on the grey quilt wasn’t quite as important as it was the previous week.

h1

42.8 Offset Dresden Flower

August 20, 2018

Since I was working on my watermelon Dresden quilt several years ago, I cut some extra red Dresden petals. They were too short for the length of petals on that project, they were all the same fabric, there wasn’t enough to make a full plate.

They kept finding themselves hanging around my stuff.

See on the right?

I finally decided to make a few more petals to round it out. Red / black combos are some of my favorite. So today some grey petals were born

I would be 2 petals short of the full patten for this alternating design.

I was finding several different fabrics that could center with the Dresden.

After noticing that I could pick some of the petals from the fabrics from the centers of the block, I tried some out.

I have been playing with the centers.

I am imagining the black bias tape as if this was a strange flower. I just had the bias tape out, and now I have put it away, and hid it from myself. So that will be as I found it.

My latest thought on this strange quilt flower, is to not center exactly the circles on the top of the Dresden.

It has been a very fun day, just working through a project from “start” to finish. I need to figure out which of my light backgrounds this should be appliquéd to. I am trying to decide if I am adding more circles nearby.