Posts Tagged ‘quilt top complete’

h1

43.4 Sukey’s Reverse Quilt Top Completed!

November 9, 2018

After coming back from a much needed vacation, I set up to finish the quilt top for the Sukey’s Reverse quilt for the guild. Last post, I was waiting for some blocks, and with special guidance, was able to ask for last minute help getting the blocks done and to me in the deadline I set for myself.

So, just before leaving on vacation, I was secure in knowing I had the blocks in my possession, and the weekend I got back, was able to “vacation de-stress” and make my “at home” quilting retreat to work on the final borders and layout and quilt top for the Sukey’s Reverse quilt.

First, I made some of what I called, “magic sashing”. 

The very edges of the quilt, I made a 1.5″ strip with mostly white, but with “cornerstones” on each side of 1.5 by 1.5 so that the sashing is the same size as the final unfinished quilt block: 12.5″ Pieces added were 10.5 X 1.5

This finished out the larger block design on the outside edge.

Another guild member made several of these “inset border” blocks, just the same small block pieces that were in the rest of the quilt. I tested out the “seminole piecing” technique of surrounding these blocks by triangles cut by a quarter square triangle method.

These borders were fun and it’s always fun to “fudge” the numbers of each color needed for the side of the quilt. The quilt is based in blues, so the swirly blue is the main color in the border. But the quilt is also based in some other cool colors, and it was fun to put them into the quilt in addition.

By surrounding the block by the same color as the white (one of the colors of the four patch) the two colored pieces appear to “float” in the quilt. Since I was doing the seminole piecing, I decided one side of the triangles would be the same background, and the other side would be colored. This also makes the pieces appear to float in the middle of the border without being too wild or hard to do.

By the end of the weekend I came back, I had the whole top together and pinned to my design wall, and all the pieced borders of the quilt done. Notice how the center fabric was one fabric I had in my stash that leans purple, and somewhere in the middle on each side, is one or two fabrics that lean blue green, but the rest are blue.

The following weekend, or maybe it was the one after, I was able to attend a sewing day and get a “stay solid border” in between on the edge of the quilt.

I had electric quilt calculated the number of blocks needed for the quilt as I had made, and then got a rough idea of the full size of the inner border of the quilt.

I was originally going to make the dark border a little narrower, but tried to “size up” a little bit to try to match the pieces on the outside.

I was close. So very close. Different adjustments might have had to be made as necessary.

Turns out each pieced border was 0.25″ too long. Trimming it up, I now have added my quilt borders shown above to the edge of the quilt.

The edge of each of the side borders is also the same background color as the rest of the background. This made it really easy to be able to trim up my slightly too long pieced borders without sacrificing the design. Also lucky me that after sewing was only 0.25″ off!

I was going to add one more dark border (hard to see in the picture above, but dark blue/blue-purple is the inside border).

This quilt is measuring 103.25 by 90.25. and this part is done up to here. I am hoping to turn it over to the quilter to have it done in the late winter/early spring for the 2019 fundraising.

Lots of work, a few “rouge blocks”, lots of cajoling or reminders of getting the blocks back, and lots more organization than I really wanted to do.

At the end, I did push my guild members to get the blocks done. But contrastingly, I did push myself to get the rest of the quilt done also. Most large chunks of spare time on the weekends so far in the last month and a half have been doing something more on my part of this quilt.

I was pretty exhausted this year doing all this guild work for 2018. Doing a large part of putting together the guild show and putting this together also, not a great idea to do both around the same time frame. Maybe if there was only one or the other, it would have been a little more manageable.

A few personal items in my life early in the year, and extra hobbies this year have pushed everything so squished for 2018.

But even with all the issues, prodding, pattern writing stress, I am happy with the quilt as it is. I find it funny that my extremely scrappy blocks made first almost look out of place. But not. Not really. So many “quilt philosophies” here. I love group quilts and seeing everyone’s creativity!!!!

I haven’t quite finished the updated instructions on the borders. It’s been a mish-mash of pictures and ideas so far which I haven’t edited down to a complete item. And it turns out that the borders fit better than I originally planned as they were actually cut.

I am going to miss having Sukey’s Reverse quilt in the house! I will need to do a major amount of donations to be able to get the quilt back! Or I could make a second one. A year from now the quilt will be drawn for. A large year and fun year of this quilt in the making.

I am also going to be happy moving on to something else for a while!!!

h1

37.5 Twilters Entwined

May 4, 2015

Early April, after I got back from my slight failure of quilting the Samurai Sudoku quilt, I had a package waiting for me on the porch!

About a year (okay not quite that long) after we set aside time to do a Round Robin, they have finally come home to their owners. I am so proud of what everyone has done for me, with me in mind, and fantastic piecing skills and color sense!

Darlas round robin quilt finished top

One of the many amazing things about this quilt is that I managed not to look at it for the entire time it was away from home.

In the next post, I will outline how round robins work, but this one I will celebrate my fantastic round robin!

The 30 second explanation: I made the center, sent the fabrics and set of instructions, and others worked on my project just as I worked on theirs.

Daisy’s idea for this round robin was to include a Journal.

darlas round robin box before sending off

I covered my journal with pretty paper from michaels. Sent along the fabrics I posted here above.

darlas rr journal covered

And the ladies doing my round robin wrote all up in the journal too!

I am going to share the rounds and journal too.

I passed my center

center for round robin quilt darla

With my scribblings

darlas journal into page

Then Diane blew up the block to something fantastic & bigger!

darlas round robin dianes round

She posted her thoughts and ideas.

darlas rr journal dianes page

It was great seeing the designs here on paper.

Then she sent to Laura.

darlas round robin lauras round

Who came up with the first mention in the journal about the Entwined border mentioned on Quilter’s Cache site.

darlas rr journal lauras page

But the quilt was too small.

And then the quilt was sent to Tami, who did folded fabrics on all the quilts I saw her work on.

darlas round robin tamis round

And Tami had all sorts of ideas going that I even got 2 journal pages from her. More than that, but these two pages were different, showing the evolution of an idea!

darlas rr journal tamis page 1

darlas rr journal tamis page 2

Its interesting to see the creative process. I LOVE it. By the way some other mention of the Entwined border was here also.

And then the quilt and journal journeyed over to Tina.

darlas round robin tinas round

Who ended up taking the Entwined border idea and running with it, just modifying it slightly to fit Tina & me!

darlas rr journal tinas page

Which also reminds me of my weave quilt that I recently finished the top.

So three Entwined mentions help set me for this in name of the quilt.

And then our fearless leader, Daisy got to round it off.

darlas round robin daisys round

There is such great quilting space here. I love the subtleness of the darker shade of pink. It actually lightens up the center of the quilt a bit.

darlas rr journal daisys page

And yes, it was worth the wait.

So then the final project sent back to me and I found some dark that I had used in the early rounds and just did a quick small border on the outside. I did this because when I went to quilt my Sudoku quilt, I was leaving lots of room on the edges and was ultimately going to cut off a lot of that. This happened 2 days before I put the border on. So I went into paranoia mode about this wonderful quilt top, so to preserve the points, one final round added.

I really didn’t look at this quilt when it was traveling around. I was determined to make it a surprise. I may or may not have been the only one surprised by my quilt in the end. Each group member posted in flickr group when we were finished with our sections. I found I could post to flickr, tag it for a group, but not look through the group.

We had our 6 members. Some groups had 5, some had disastrous setbacks at first.

I trusted my group, and was such a proud member of the group. And they did great on my quilt!

darlas round robin start to finish

We also signed backing labels!

Darla Pink and Purple Round Robin top and name panel

And I am proud to say I have already finished piecing the back!

twilters entwined pink round robin backing

And the journals was just so yummy & special. My favorite non-quilty part!

Darla RR Journal Collage


h1

36.9 Weave On took over March-A-Long

March 10, 2015

I am not certain how or why, but possibly when I was doing the ceramics last week on my day off, I woke up the following day with a solution to a 4 year old problem. Well probably a 2 year old quilting problem.

weave border top completed with weaved borders

Four years ago, I, on a whim, made a quilt with 3 main colors, blue, red & yellow. I improvised a pattern that I saw online, but I couldn’t have told you who or what then, all I know is I made what I called a Weave quilt.

Then I came up with a variation on borders that I have seen several places that involved paper piecing & bias tape. I made lots of these border blocks using 3 fabrics for the borders that I also bought on a whim.

It turned out that I didn’t plan ahead on borders, I was originally when I bought the fabric, thinking I would do inner, middle & outer border in plain sizes.

This often happens, I was starting to run out of red fabric in the borders, but I wasn’t all the way around the whole quilt.

So then I decided to well, stop making the weave borders that I had planned & already started. And then I needed to come up with a clever end to this pattern, this quilt.

That was 2 years ago. I am certain I talked of this quilt before on this blog before at least once or twice.

Any event, the ephiphany happened and now I suddenly gotten taken over by this quilt, a desire to finish it before guild (tonight) pushed aside plans on both Sunday and today (my day off this week instead of Saturday).

It still took a good chunk of time on Sunday, and I did some unsewing of blocks once I figured on size, and measuring, and drawing what to do both on paper & EQ7.

weaved ends close up borders

I had figured out the two corner blocks a while ago, but hadn’t made them.

connected corner on border

The ends are little applique circles of the fabric I had stored with this quilt.

Circular ends

The biggest compromise I had to make with myself is not floating the border in blue fabric. I still wish I could have done it that way, but I completely didn’t have enough of the same blue, and I do like that the red just trounces off the edge of the quilt while the yellow stays connected.

Wow it feels great to get this done. My March-A-Long which I was only going to work for 15 minutes turned out to be another full weekend of mostly quilting. That is both good and bad.

I could feel an urge to get this done before the guild, to finish it off before my mind was tired of working on it. It really only needed the bordered finished and then attached.

More borders, who would have thought? I wonder if any more quilts only need borders on them? I could get a lot of these UFO’s to the next stages.

h1

33.2 Kings Royal Red Puzzle quilt top complete

November 30, 2013

The main thing I worked on at the last quilting retreat, and the last two weekends since, has been the Kings Puzzle quilt.

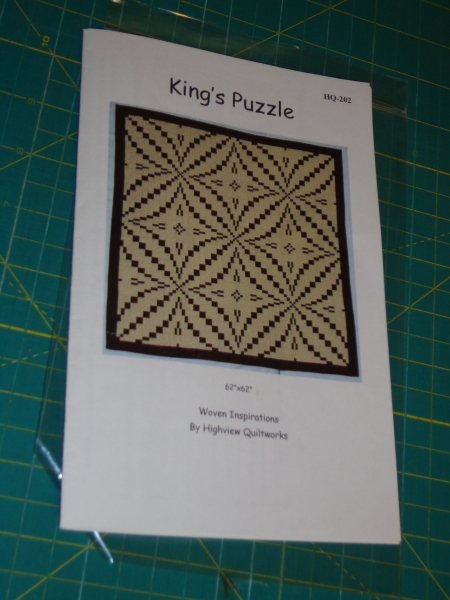
The pattern is called King’s Puzzle, created by Lois Hatleberg, and published by QuiltWoman.com

This past weekend I finished sewing all the blocks together and all the sashing together in the blocks.

kings puzzle top outside

The original pattern done with a light background and dark red blocks. Our LQS had a light background and blue for the dark areas.

kings puzzle quilt

And I had thought I was going to attempt this a year ago, and at that time I had cut out strips for all the dark reds. But I was missing something. I didn’t quite have enough fabric for the whole quilt to be that red & that black.

So in my mind I set out to do 3 different colors of reds. A dark, medium & light, but all very saturated reds.

Two days before leaving on retreat I found the right color of ‘bright (light value) red’ for the quilt, and I had already bought the other two reds.

It was hard to estimate how much of each red I would need since I knew I was going to separate out the middle and edge of each design. In fact I pretty much ran out of (twice) the middle color of red that dominates much of the quilt space.

Before I started actually cutting this time around, I did some diagramming & thinking.

kings puzzle self instructions page 1

First I had to know the general area for medium & dark & light and then I had to count them. Never underestimate symbols and colored pencils in helping plan out things.

I used symbols such as L for light, D for dark in sections that would be important.

And then I just had to flat out count what I had.

And then I redrew the strip sets & calculated (wrongly originally for the row 6 actually) how many of each I would need based from the drawing I had done above.

kings puzzle self instructions page 2 and 3

And then I had to estimate how many strips to make of each color and label, label, label.

labeled strips by width for each row

And then I could make strip sets.

kings puzzle strip set

And then cut the strip sets into strips for the final blocks.

kings puzzle strips and more strips

And then get the strips in order to make the blocks.

kings puzzle first block layout before sewing together

After making several blocks. This was the last afternoon of retreat how far I was some time in the middle of that afternoon.

kings puzzle quilt blocks on design wall

I worked then on getting all the sashing complete (or close) before leaving the retreat center.

DSC05673

And so upon coming home I had a few sashing pieces to rip out because when I changed one of the long sashing sub-pieces, I didn’t rename it a different name and so didn’t create enough smaller sub-pieces of the right size.

And then a few blocks to complete.

one chunked section of kings puzzle quilt

And so now I have the top complete, minus borders.

kings puzzle top complete inside

Good thing I had things ultra organized & sticky noted and grouped & pinned. It helped tremendously in getting the thing together without wanting to tear out my hair. Or stop. I would have stopped on this, I never would have gotten back to it.

Not complicated, but very time consuming.

A true bargello? I don’t know, but it is of the same style, strip sets broken up & resewn together.

And a border fabric? I have two possibilities!

kings puzzle quilt border choices

h1

33.1 Hexadaisy Rings quilt top finished

November 27, 2013

I have yet to find a good name for this quilt.

The quilt is based from a Craftsy pattern called Hexadaisy.  I first made the original in rainbow colors, and had the quilt auctioned off for charity.

I discussed a few times the hexadaisy pattern, but mostly here.

But then I wanted to make one for me, a larger quilt.

I have finally finished the top of this hexadaisy hex ring.

hexadaisy ring

The middle part that I made for the auction in July was a little bit smaller than this, the original size of the pattern.

quilt show auction quilt hexadaisy rainbow

The post where I was very frustrated at the FMQ of my old vintage machine is here if you want to relive my stress over the auction quilt.

But my mind couldn’t just leave it alone after seeing the ease of these two pieces for the pattern.

Originally I tried to push myself to get both quilts done before the July quilt show, but then I took a quilting siesta of 2 months straight, which I probably needed, and then just focused on the deadline stuff first.

But I never forgot the other pieces I had planned.

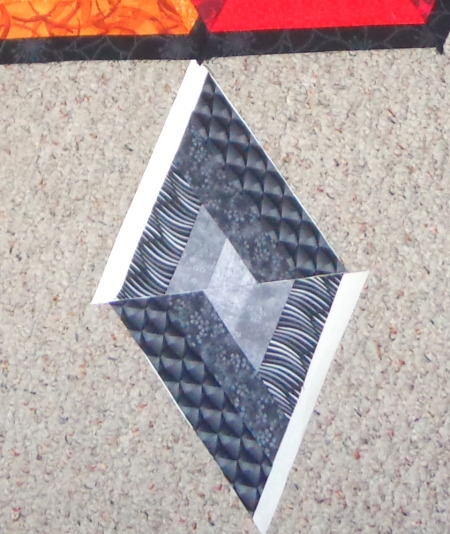
I had to get grayscale for my grays to make sure they were gradating correctly.

greyscale greys to decide color gradation

And then I modified the piece slightly and created diamonds using 95 % of the original pattern to make this.

grey triangles

Light in the middle, darker toward the outside.

And then settled on the inside grey for the outer rings.

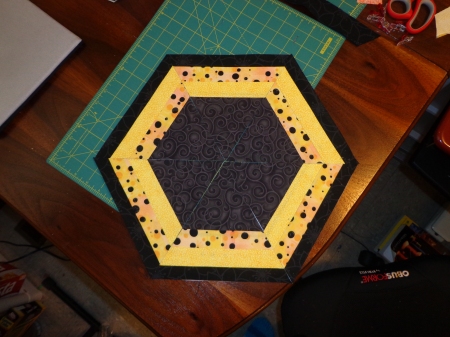
swirly grey centers

And I came to the last retreat with the whole thing done and some of it pieced together.

layout for larger hexadaisy squared

I was going to call it hexadaisy squared, then hexadaisy cubed, then hexadaisy hexed, then hexadaisy hex ring (which sounds just slightly off of something naughty), now I am thinking Hexadaisy Rings.

Ideas? Offshoots of this name?

I am not going to square up the sides at all, but I am considering putting in some built in supports into the finished quilt (which is way far from being quilted as of right now). A lady came to our guild over a year ago and showed how she was able to make her quilts hang sideways and length ways and hang straight using wooden supports sewn into the other sections of the quilt. I want to try that too.

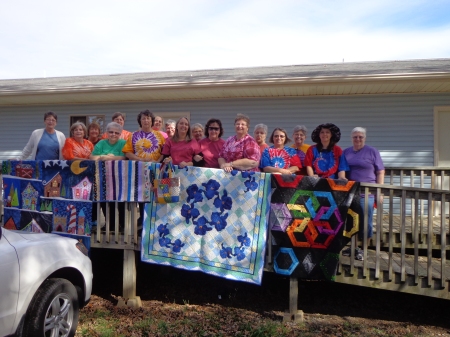
I want to make sleeves on all 6 sides so I can rotate the quilt when I hang it up depending on which way I want it that day.  When we took our group picture from the retreat, I occasionally rotated my quilt so some people got orange on top, some people got purple on top. Way cool.

DSC05658

I also have the binding picked out & even pre-made, but I can’t find it currently so no picture of it yet.